Sector 0 picture
03/08/2006
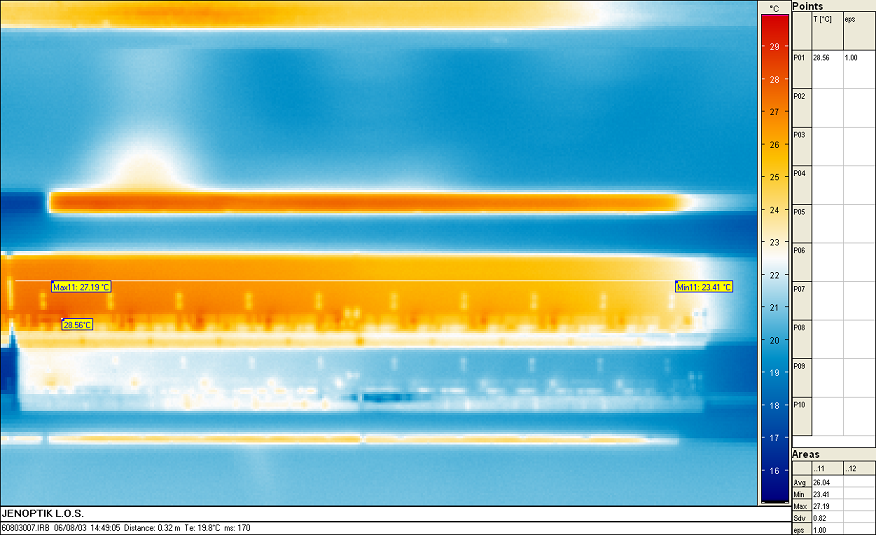
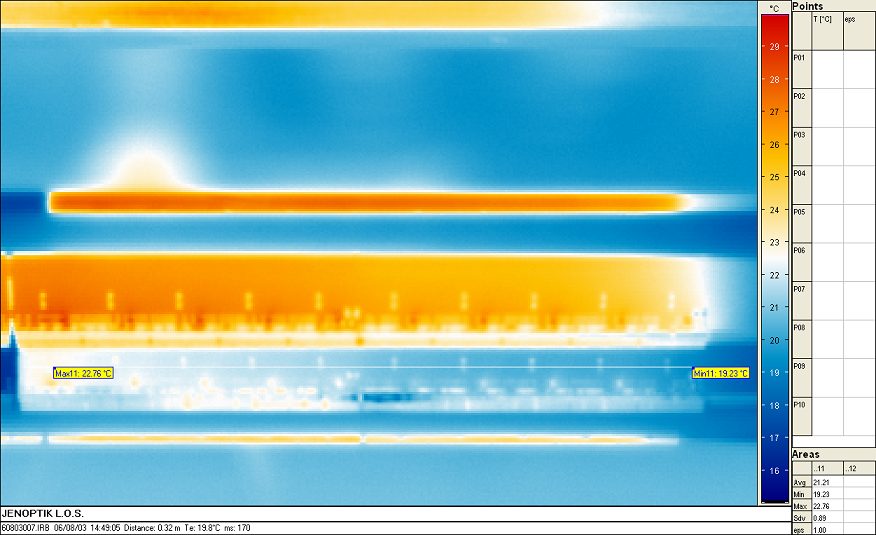
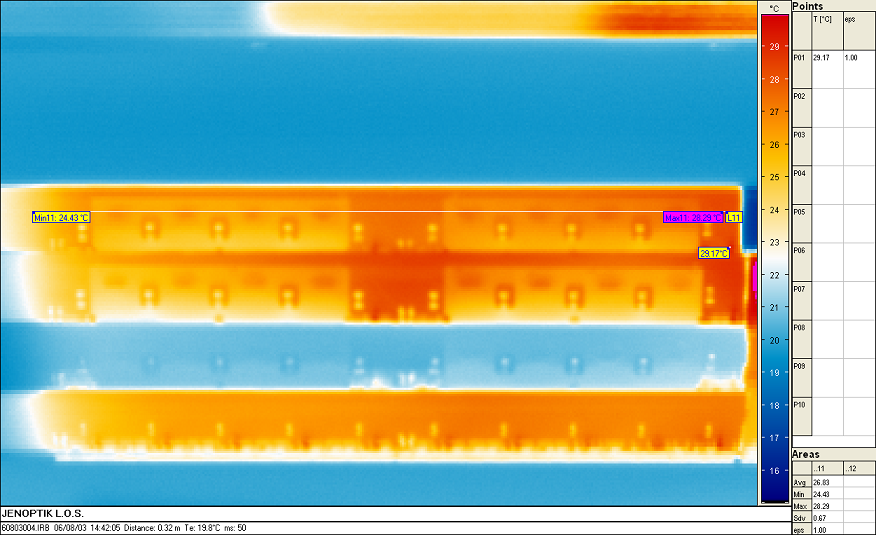
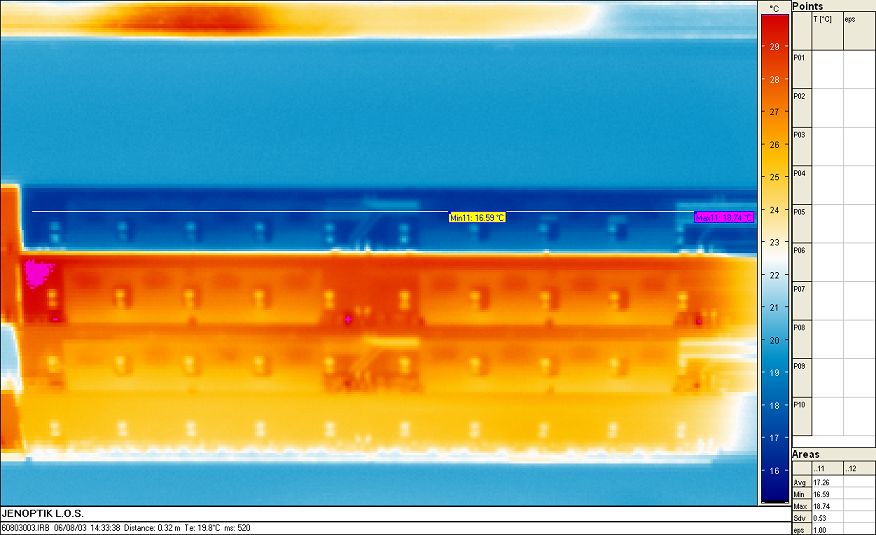
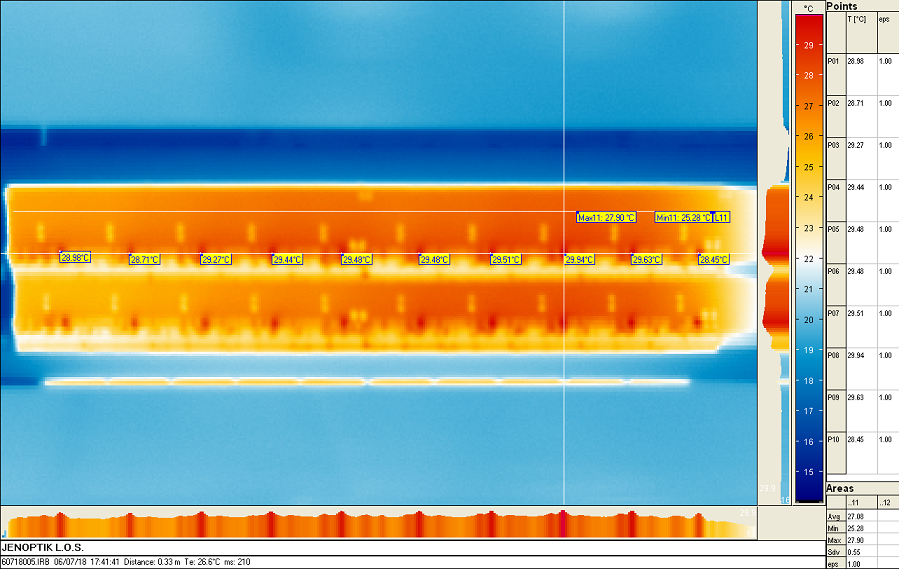
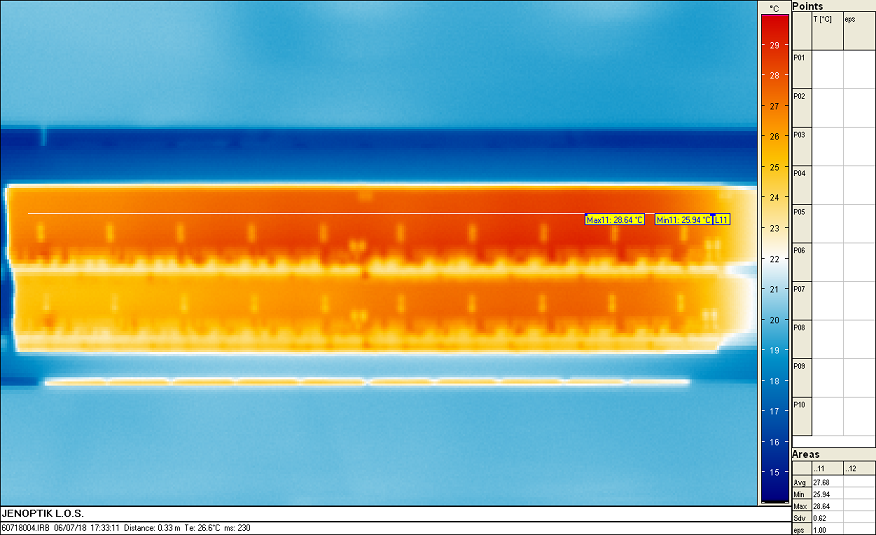
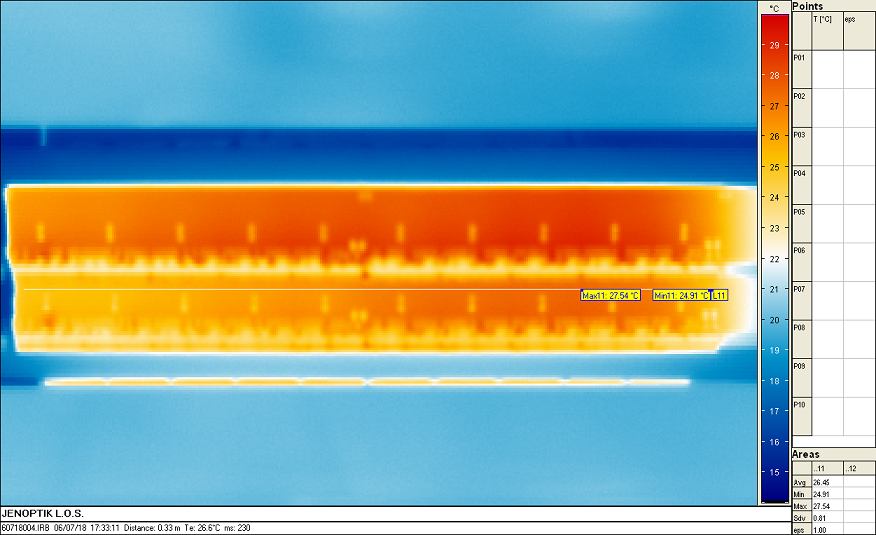
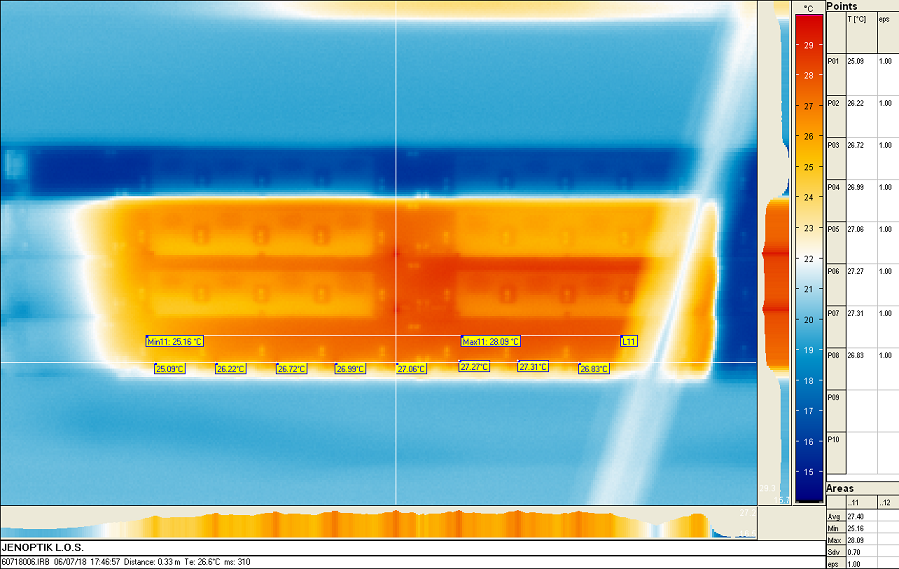
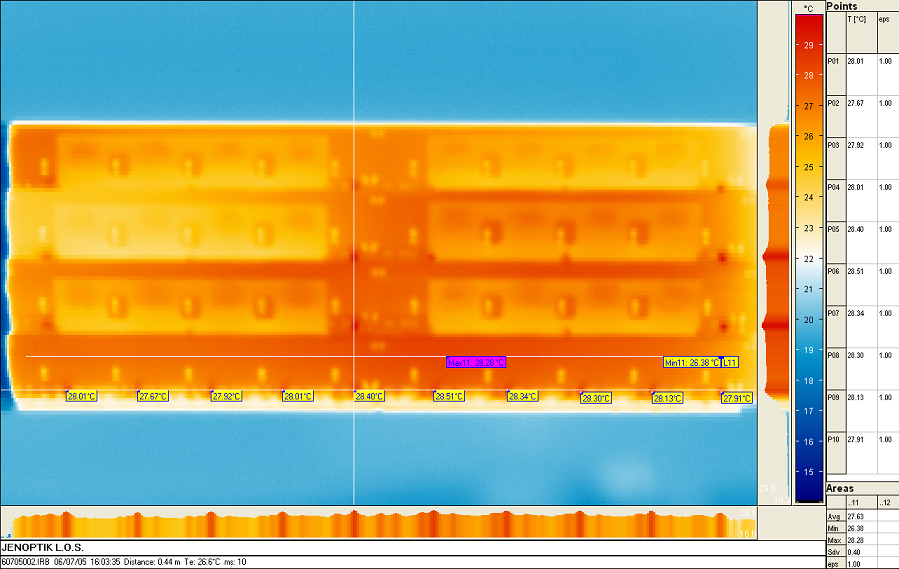
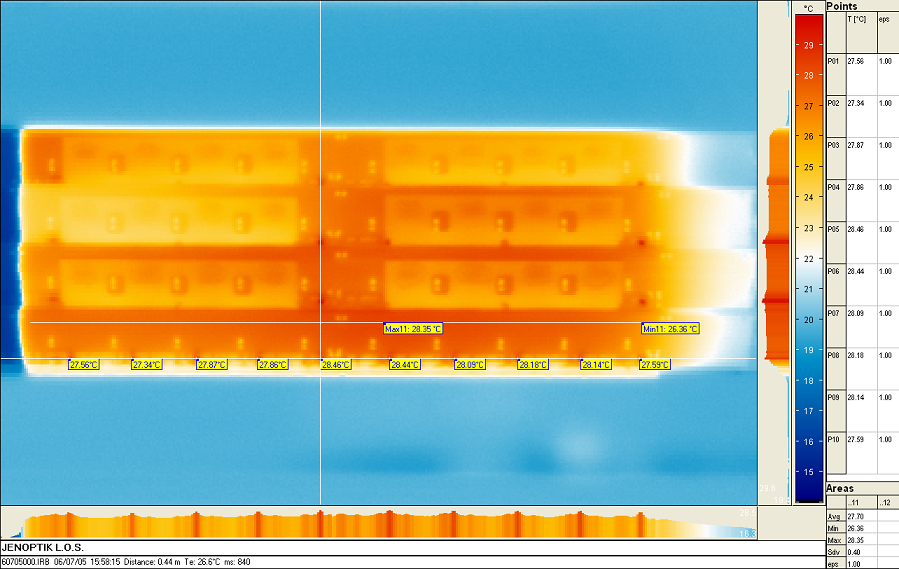
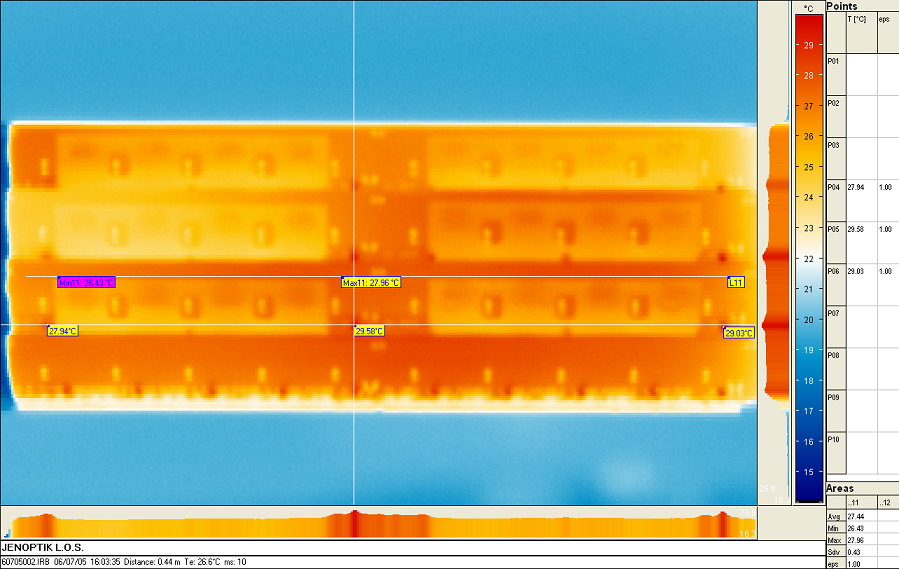
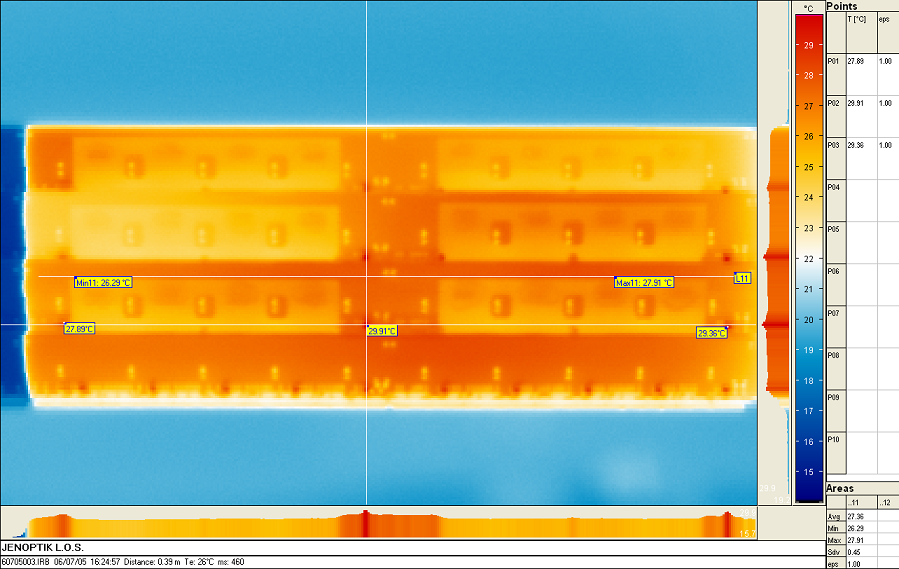
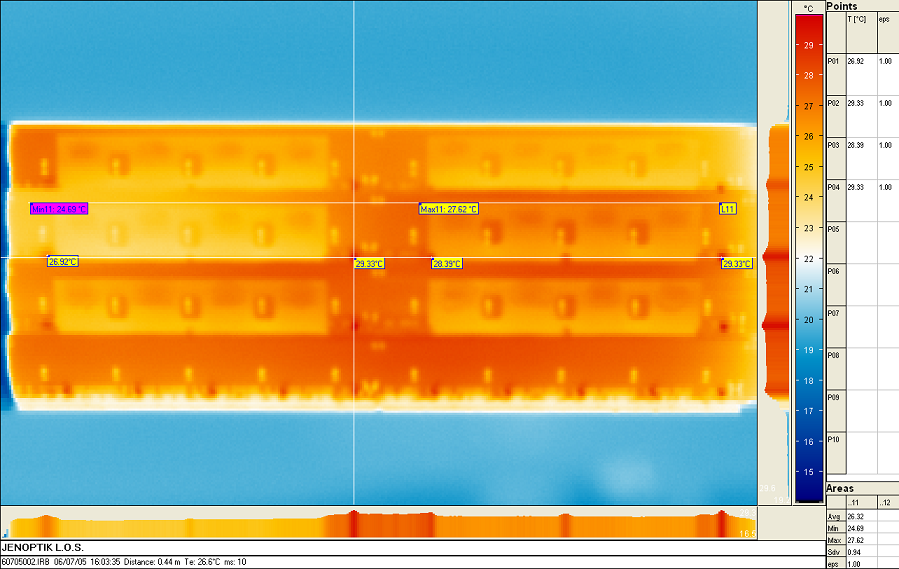
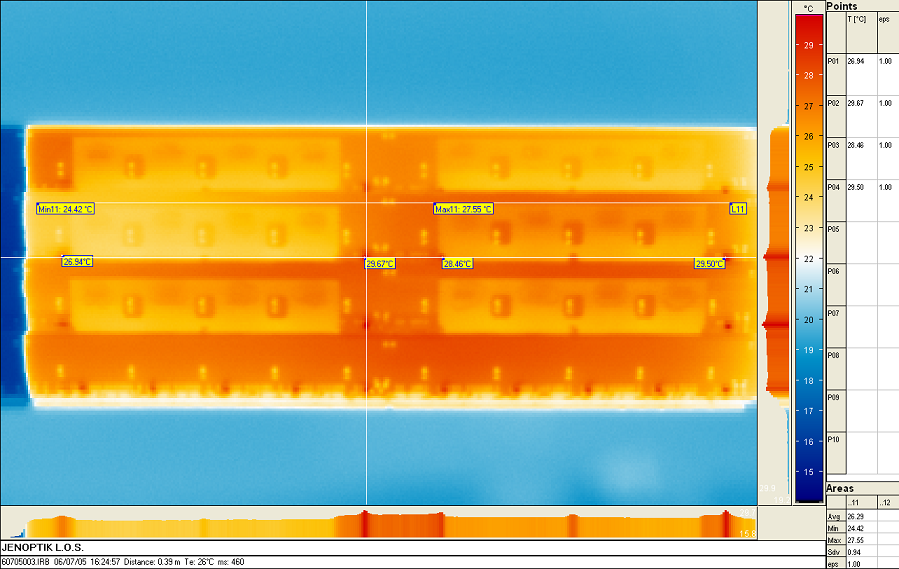
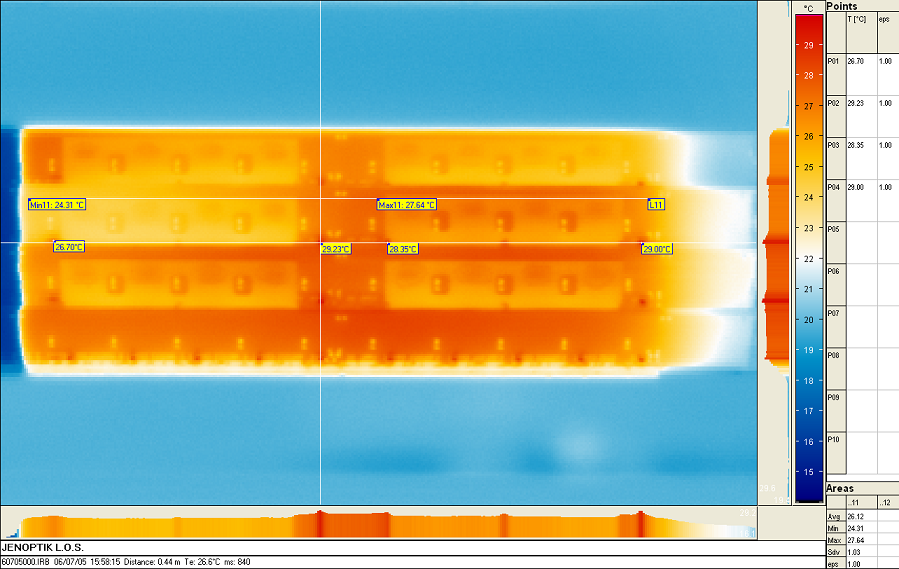
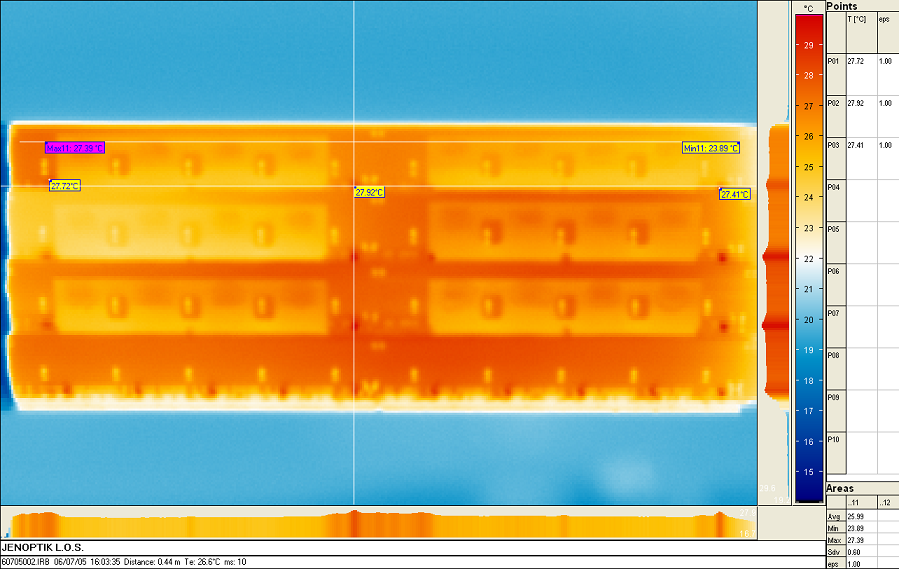
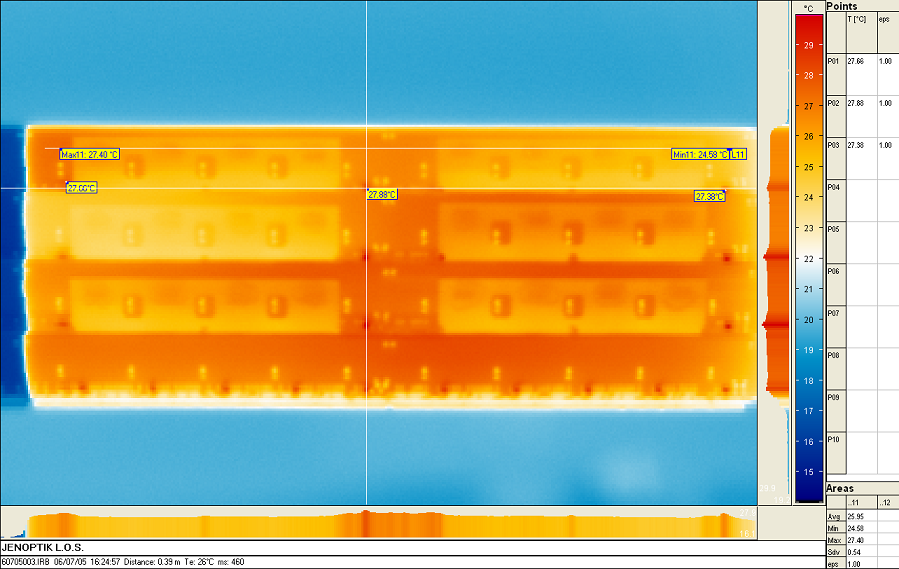
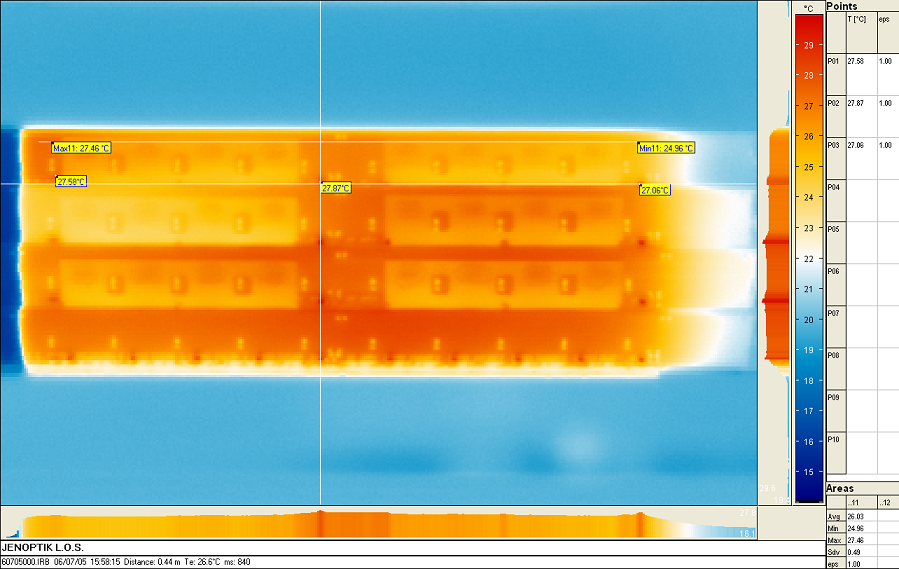
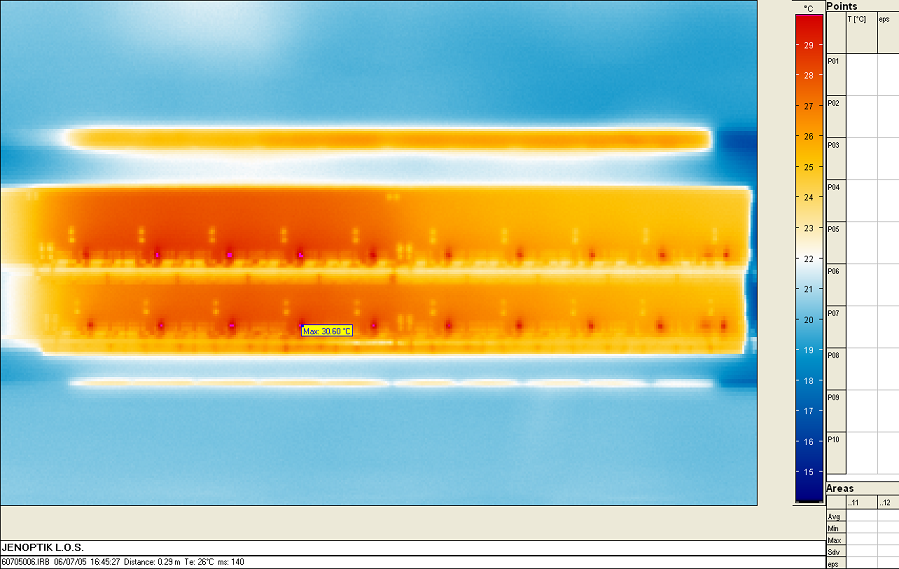
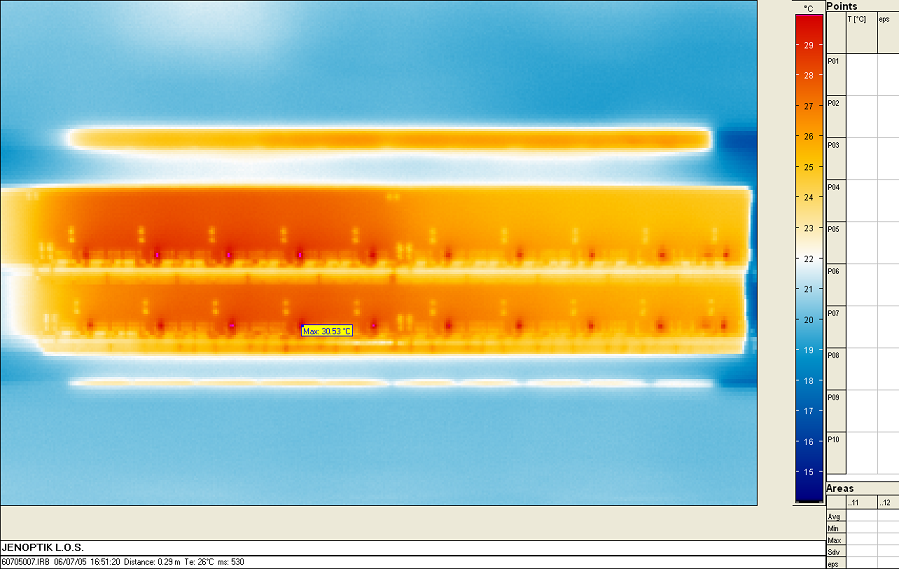
Side A temperature screenshots
Side C temperature screenshots
Sector 1 picture
Sector 1 Side A picture
Temp Plot Side A 14/06/2006:
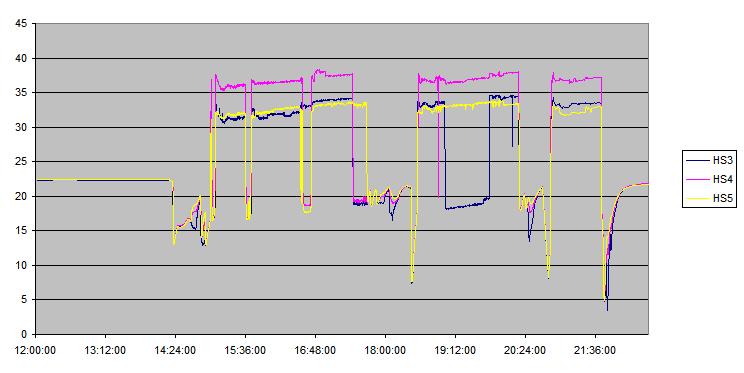
Temperature Plot Sector1 Side A 15/06/20006:
Sector 1 Side C picture
Sector 2 picture
18/07/2006
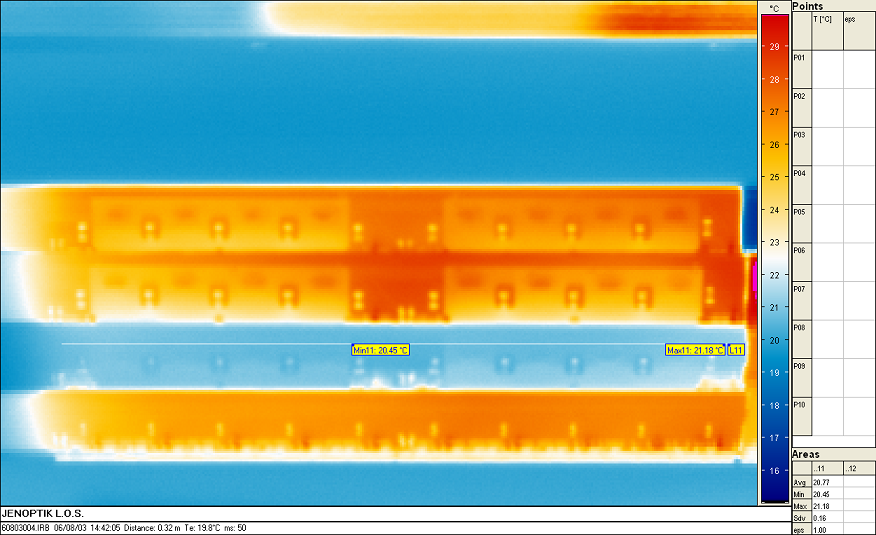
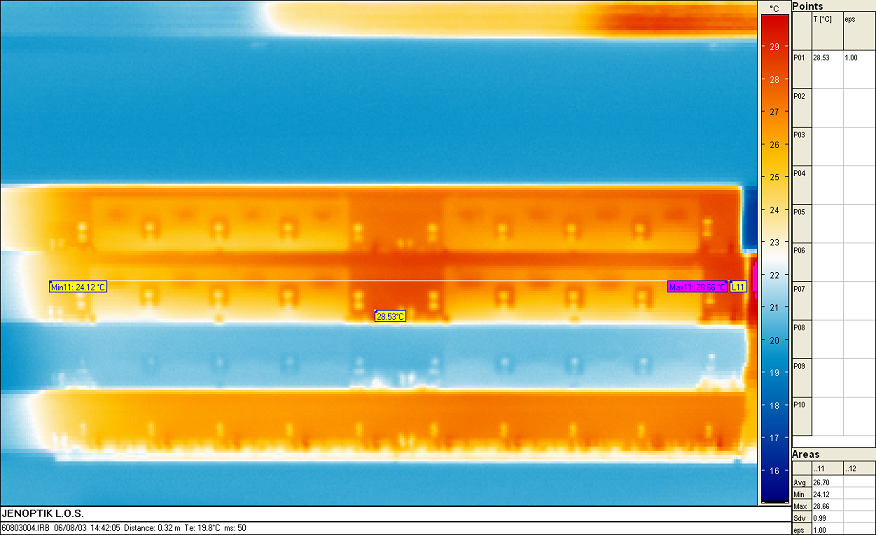
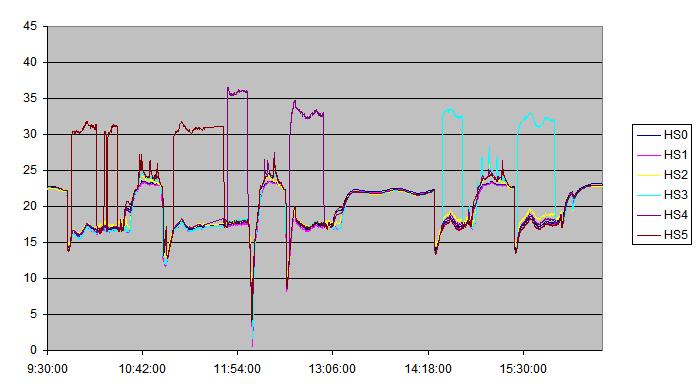
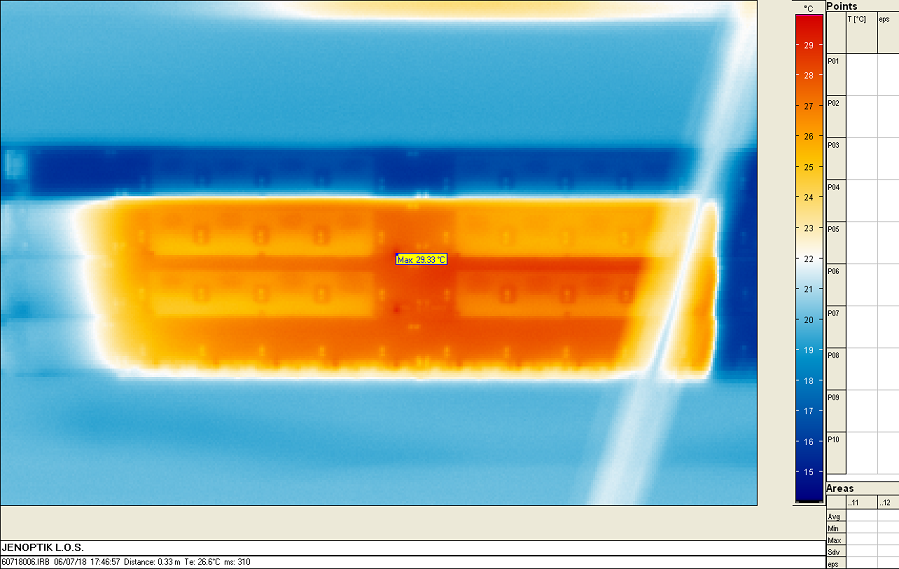
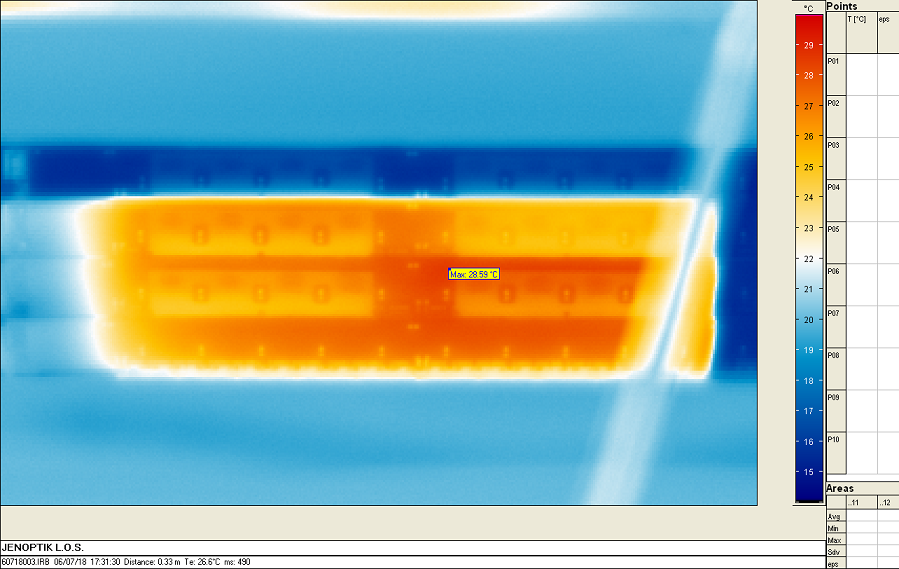
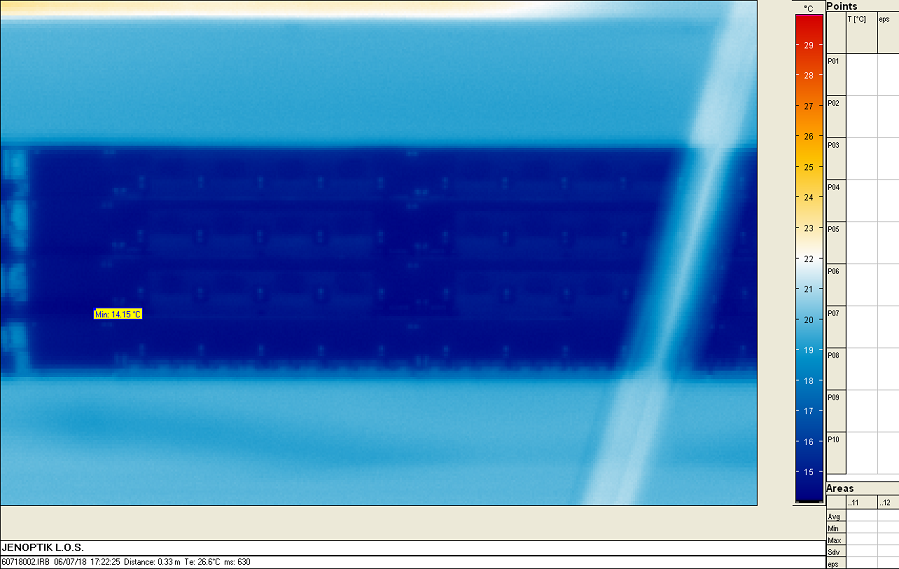
Side A temperature Screenshots
HS0 With Configuration @30V, HS0 Without Configuration
HS1 With Configuration @50V, HS1 Without Configuration
HS2 With Configuration @50V, HS2 Without Configuration
HS3 With Configuration @50V, HS3 Without Configuration
HS4 With Configuration @2V, HS4 Without Configuration
Inner Layer With Configuration @50V, Inner Layer Without Configuration, Inner Layer Without Power
Outer Layer With Configuration @50V, Outer Layer Without Configuration, Outer Layer Without Power
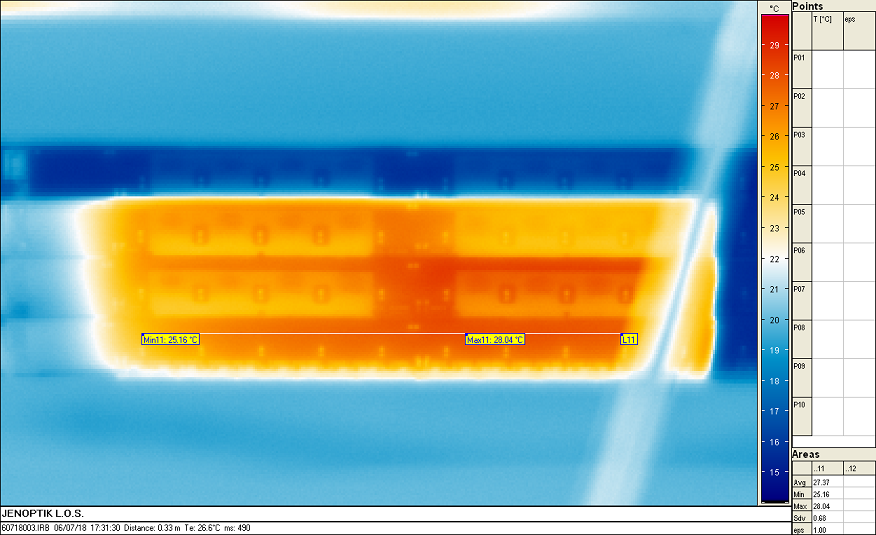
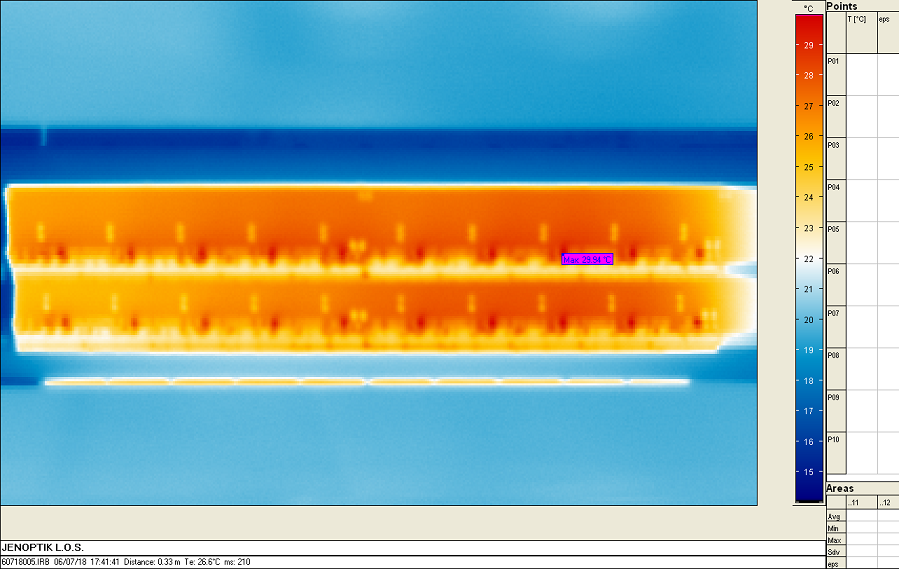
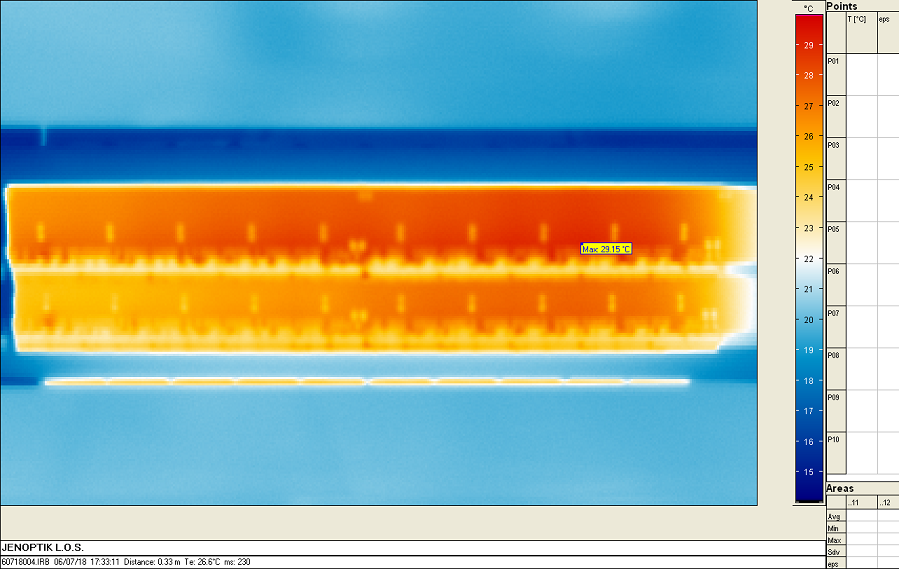
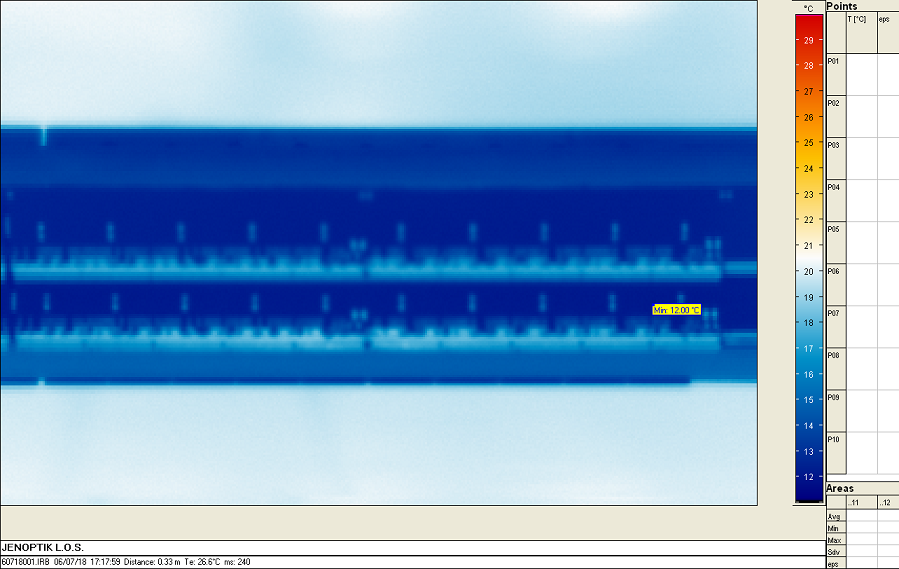
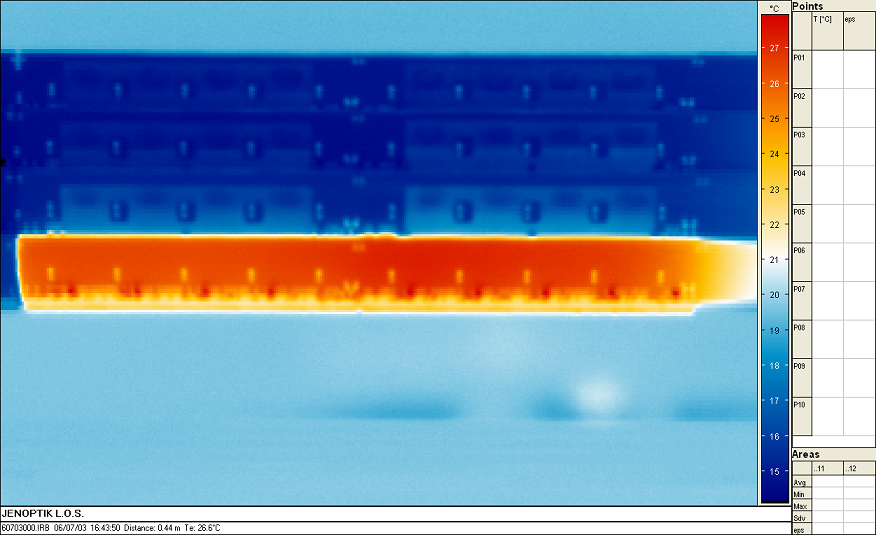
Side C temperature Screenshots
03/07/2006
HS2 Without Configuration, HS2 Without Configuration (with Mes.)
05/07/2006
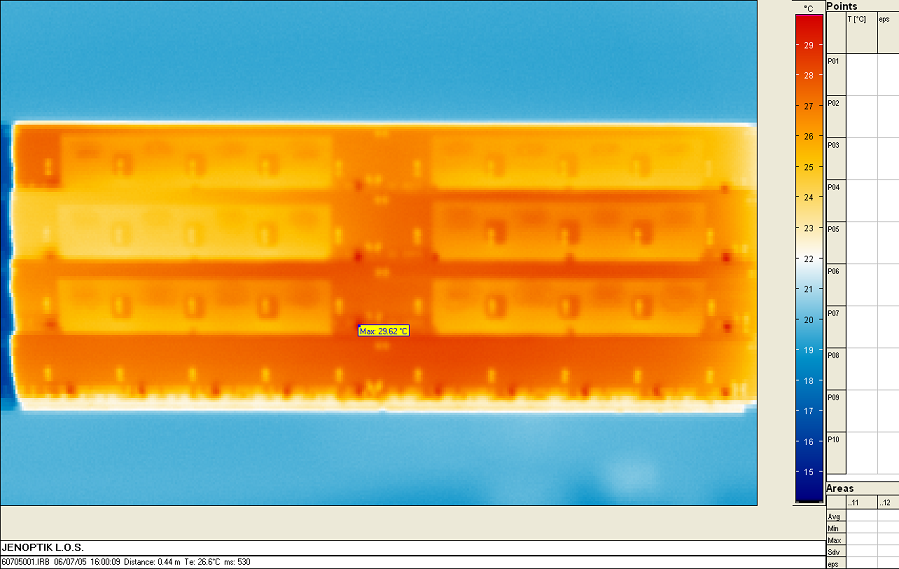
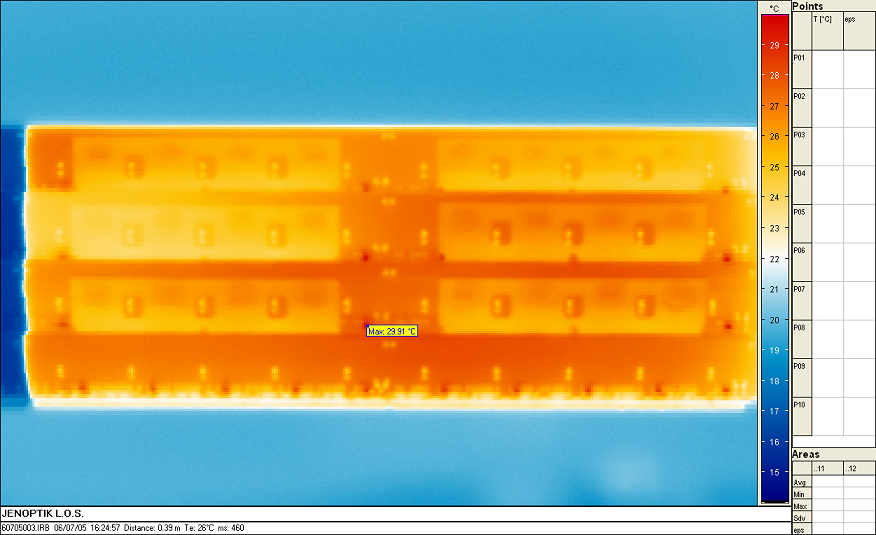
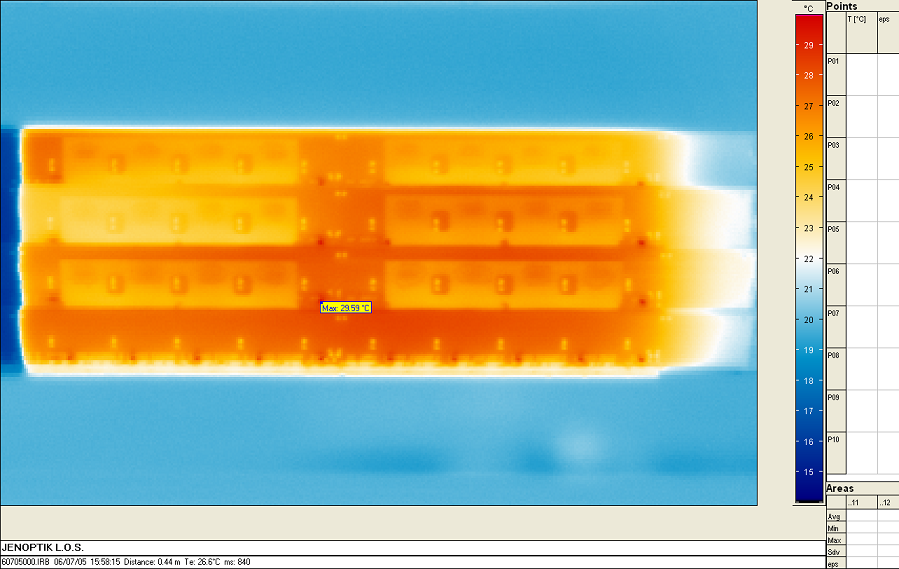
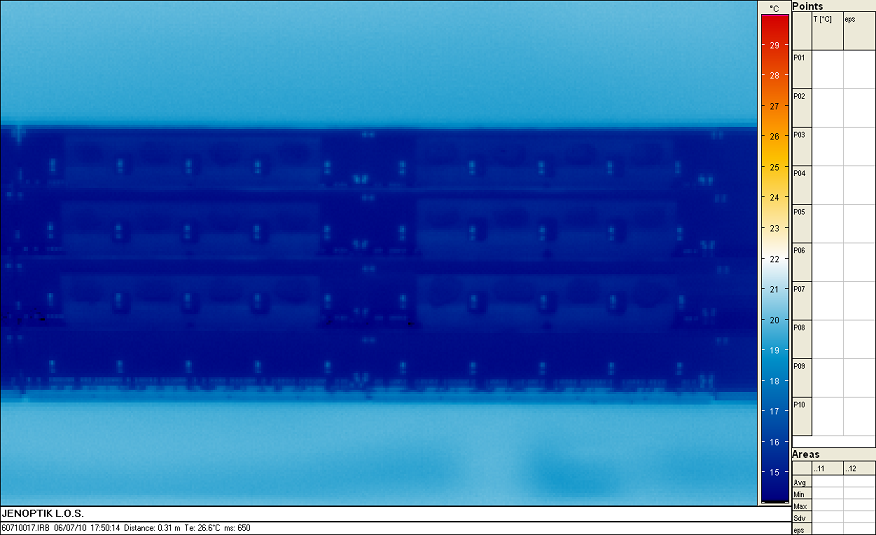
HS0 With Configuration @2V, HS0 With Configuration @50V, HS0 Without Configuration
HS1 With Configuration @2V, HS1 With Configuration @50V, HS1 Without Configuration
HS2 With Configuration @2V, HS2 With Configuration @50V, HS2 Without Configuration
HS3 With Configuration @2V, HS3 With Configuration @20V, HS3 Without Configuration
HS4 With Configuration @2V, HS4 With Configuration @50V, HS4 Without Configuration
HS5 With Configuration @2V, HS5 With Configuration @20V, HS5 Without Configuration
Inner Layer With Configuration @2V, Inner Layer With Configuration @50V, Inner Layer Without Configuration, Inner Layer Without Power
Outer Layer With Configuration @2V, Outer Layer With Configuration @50V, Outer Layer Without Configuration, Outer Layer Without Power